|
|
|
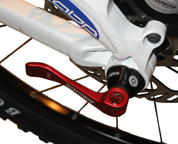
Figure 1: ABP Race quick-release lever (left) and nut (right) |
The ABP Convert system can be changed from a standard 5mm quick-release skewer to a large-diameter 15mm skewer. To make this change, additional parts are required: consult your dealer. For proper and safe adjustment of an ABP Convert quick-release, read and follow these instructions carefully.
|
|
|
Figure 1: ABP Race quick-release lever (left) and nut (right) |
1. Swing the quick-release lever to the OPEN position.
2. Turn or rotate the lever to disengage the skewer threads from the ABP nut. With ABP Race, the adjusting nut is fixed to the frame.
3. Slide the quick-release skewer out of the hub and frame.
4. Remove the wheel.
1. Place the rear wheel in the dropouts.
2. Slide the quick-release skewer through the left hand bearing and the wheel axle and turn the lever to engage the adjusting nut threads.
3. Move the lever to the OPEN position (Figure 2).
4. With the lever about halfway between the OPEN position and the CLOSE position, tighten the adjusting nut (Figure 3) until finger-tight.
5. Place the lever in the palm of your hand and throw the lever as shown in Figure 4 to the CLOSE position (Figure 7).
At the half-closed position of the lever, there should be some resistance.
• Do not tighten by turning the lever like a wing nut (Figure 4); this will not result in sufficient force to hold the wheel in place.
6. If the lever is moved to the CLOSE position with little or no resistance, clamping strength is insufficient. Return the lever to the OPEN position, tighten the adjusting nut further and close the lever, and again test for resistance.
7. Orient the lever so it does not interfere with any other bicycle part or accessory part (such as rack or fenders) or touch any part of the bicycle, and so obstacles in the path of the bicycle cannot snag the lever (Figure 6).
If necessary, re-install the wheel with the quick-release lever on the other side of the bicycle, or speak to your dealer about a quick-release that closes correctly and does not touch the bicycle.
8. Test that you have properly adjusted and closed the quick-release.
If the quick-release does not pass any test, either repeat these adjustment procedures, including the tests, or take your bicycle to your Trek dealer for service.
|
|
Figure 2: Lever positions |
|
|
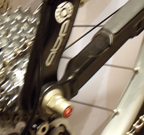
Figure 3: Adjusting nut |
|
|
Figure 4: Swinging motion of quick-release lever |
|
|
Figure 5: Do not rotate the lever to tighten |
|
Figure 6: Alignment of the rear quick-release lever |