Figure 1:
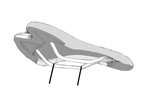
Seat and seatpost
The seat, the part you sit on when riding a bicycle, is held in place by the seatpost (Figure 1). The seatpost binder secures the seatpost in the frame. Proper adjustment of each component is important for your comfort and pedaling efficiency. This section explains how to inspect, adjust, and lubricate your seatpost and seatpost binder.
Read the Warning for Mechanics before performing any service work on your bicycle.
|
|
Figure 1: Seat and seatpost |
|
|
Figure 2: Saddle rails showing the flat or straight area for clamping |
Each bicycle or frame we make is intended to be used with a specific seatpost diameter and length. If you replace the seatpost with a seatpost of a different diameter or a longer seatpost, this can put unknown forces on the frame that could cause damage. Do not change the seatpost on your bicycle.
Some saddles have oversize saddle rails, with a larger diameter to provide extra strength. These saddles require a special seatpost to accommodate the larger rails. Using the a seatpost with the wrong size of saddle rail clamp could cause the saddle to break or come loose unexpectedly. If you are not sure if your seatpost will accommodate your saddle, consult your dealer.
For the Madone, follow the Inspection, Adjustment, and Lubrication instructions for the Seat mast.
Every month inspect the seat post binder bolt and seat fixing bolt(s) (Figure 1) for proper tightness. Make sure the seat is secure by attempting to turn the seat and seatpost in the frame, and attempt to move the front of the seat up and down. If the seat rotates, is loose, or moves up and down, tighten the binder bolt or quick-release, or seat fixing bolts, and repeat the test. Never engage the seatpost binder with the seatpost out of the frame; you could crush the seat lug.
Tighten the bolts of the seatpost or seatpost binder bolt to the torque specifications.
Before every ride, inspect your seatpost for signs of stress or fatigue. If your bicycle has a carbon fiber seatpost, also follow the carbon fiber composite inspection procedures.
|
|
Figure 3: Bontrager seatpost |
Information on proper positioning of the parts is found in the section Fitting the bicycle.
1. Loosen the seat fixing bolt just far enough so the seat can be tilted fore and aft.
· Some seatposts use two bolts, where angle adjustment is done by loosening one bolt and tightening the other bolt.
· With a Bontrager seatpost using a single, cross-head bolt (Figure 2); after loosening the seat fixing bolt, apply pressure to the top of the saddle directly above the clamp. This will loosen the clamping mechanism to allow rotation.
2. Place a straight edge, such as a bubble level or ruler, across the top of the seat to better see the angle.
3. Adjust the seat and re-tighten the seat fixing bolt as in Inspection.
Before making this adjustment, note the angle of the saddle. Sliding the saddle fore or aft might change the angle, so you may have to re-adjust it.
The saddle is supported by two rails, metal strips or rods. The rails have a flat section that is designed to fit the seatpost clamp (Figure 2). Do not clamp the curved part of the rails in the seatpost clamp. Make sure the seatpost is only attached to the flat, or straight, part of the rails. If the saddle is clamped incorrectly, an unusual amount of force will be created that could cause the saddle or the seatpost to break.
Warning—A seatpost that is positioned incorrectly can break the saddle rails or the seat clamp bolt and can cause you to lose control and fall. Only clamp the straight, flat portion of the saddle rails in the seat clamp.
1. Loosen the seat fixing bolt just far enough so that you can slide the seat fore and aft.
· Some seatposts use two bolts; slightly loosen both bolts.
· With a Bontrager seatpost using a single, cross-head bolt (Figure 2); after loosening the seat fixing bolt, apply pressure to the top of the saddle directly above the clamp. This will loosen the clamping mechanism.
2. Slide the saddle fore or aft in the saddle clamp.
3. Re-tighten the seat fixing bolt as in Inspection.
1. Loosen the seatpost binder bolt, or quick-release.
4. Extend the seatpost to the desired position.
3. Make sure the minimum insertion mark (Figure 5) on the seatpost is not visible above the bicycle frame. A minimum of 2 1/2 inches (64 mm) of seatpost must remain in the frame.
4. Re-tighten the seatpost quick-release, or bolt, as described in Inspection.
Warning—A seatpost that is positioned too high can damage the bicycle and can cause you to lose control and fall. Do not change seatposts. Make sure the minimum insertion mark (Figure 6) is inside the frame.
|
|
Figure 6: Minimum insertion mark on seatpost must always be inside the bicycle frame
|
Metal seatposts and carbon fiber seatposts require different care and lubrication. Regardless of the seatpost material, if the seat tube of your bicycle frame is carbon fiber, follow the instructions for carbon fiber seatposts.
Lubricate the seatpost every year.
1. Loosen the seatpost binder bolt, or open the quick-release, and remove the seatpost from the frame.
2. Wipe any old grease off the seatpost, and clean if necessary.
3. Apply a thin layer of bicycle grease or a similar lubricant to the section of the seatpost that will be inside the frame.
4. Insert the seatpost into the frame.
5. Adjust the seat to the proper height, align it with the frame, and tighten the seatpost binder bolt, or close the quick-release lever, as explained in Inspection.
For instructions to lubricate parts made of carbon fiber composite, read the section on Carbon Composite Inspection and Use.