|
|
Figure 1: Axle is the long bolt that passes through the hub |
Begin by opening the brake type(s) on your bicycle:
1. Loosen the axle nut of the axle bolt (Figure 1).
2. Slide the rear wheel down and out of the dropouts.
|
|
Figure 1: Axle is the long bolt that passes through the hub |
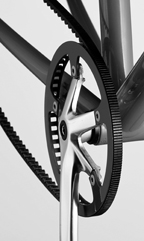
1. Lay the drive-belt on the front sprocket and align it (Figure 2).
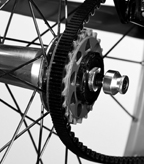
2. Place the rear sprocket in the loop of the drive-belt on and align it (Figure 3).
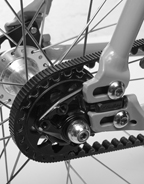
3. While placing light tension on the drive-belt, swing the wheel into the rear dropouts (Figure 9).
4. Tighten the wheel axle nuts.
5. Check that the alignment and tension of the drive-belt are correct.
|
|
Figure 4: While you maintain tension on the drive-belt, swing the rear wheel into the dropouts |
|
|
Figure 2: Drive-belt placed loosely on front sprocket |
|
|
Figure 3: Drive-belt placed loosely on rear sprocket |
1. Pick up the bicycle, and sharply hit the top of the tire (Figure 5). The wheel must not come off, be loose, or move from side to side.
2. Spin the wheel to see that it is centered and the wheel turns freely without rubbing.
|
|
Figure 5: Test for looseness |
1. Close the brake.
2. Make sure the brake is working properly: