|
|
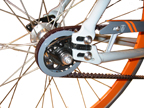
Figure 1: Drive-belt as part of the drivetrain |
The drive-belt (Figure 1) connects the crankset to the rear cog). This section explains how to inspect, adjust, and lubricate the drive-belt. Gates Carbon Drive™ drive-belts are extremely durable and offer long life when properly handled. However, improper handling, such as bending, twisting, or crimping can damage the carbon tensile cords that provide the strength of a drive-belt. Under high load, a damaged drive-belt can break.
|
|
Figure 1: Drive-belt as part of the drivetrain |
Proper drive-belt tension and alignment are critical to maintain optimum drive operation. Low tension can cause “ratcheting,” or slipping on the teeth of the sprockets. This results in a popping sound and can damage the carbon tensile cords inside the drive-belt. Excess tension can damage the bearings and increase wear on the drive-belt and sprockets. Excessive tension often results in an increase in pedal resistance.
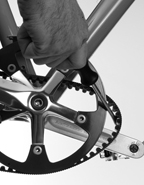
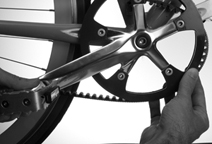
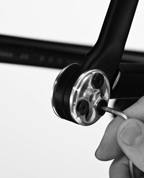
When installing the drive-belt onto the rear wheel, do not pry on the drive-belt (Figure 2), or “roll” on the drive-belt by rotating the cranks (Figure 3). The drive-belt should be installed loosely and then tensioned only when aligned and in the correct position. Prying or rolling the drive-belt can lead to breakage. See the section Handling a drive-belt for more information.
|
|
Figure 2: Do not use a lever to pry on the drive-belt |
|
|
Figure 3: Do not pedal the drive-belt into place |
Once a month check that the drive-belt is clean.
Once a month, check the tension and alignment of the belt drive. With good maintenance, a belt usually lasts 10,000 to 15,000 miles (16000-24000km) on a road bicycle. Replacing the belt takes special tools and training and should only be done by your Trek dealer.
1. Align and pre-tension the drive-belt.
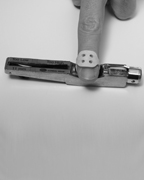
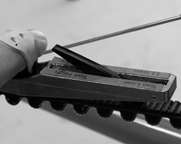
2. Place a finger into the rubber band holder on top of the tension tester tool (Figure 4).
3. Place the bottom of the tester on the smooth, outer surface of the drive-belt, midway between the front and rear cogs. Make sure the lip of the tester is touching the side of the belt.
4. Press down on the tester slowly and steadily until the tester makes an audible “click.”
5. Check the position of the indicator (Figure 5). If the leading edge of the indicator is within the green zone on the tester, the tension is correct. If the leading edge of the indicator is in a red zone, readjust the tension.
|
|
Figure 4: "Cricket" tool |
|
|
Figure 5: Indicator shows drive-belt tension |
If the tension tester tool is unavailable, the force deflection method can be applied. Press on the drive-belt with approximately 5-10 lbs of force. Proper tensioning is achieved by deflecting the belt 0.5” (12mm).
1. Pedal and back-pedal 10-15 times.
2. Check the alignment of the drive-belt on the rear sprocket. The edge of the drive-belt should be within 2 mm of the inside flange of the rear sprocket (Figure 6 shows incorrect alignment).
If the drive-belt is not correctly aligned, see the section Adjusting the alignment.
NOTE: After correct drive-belt alignment is achieved, the rear wheel might not be perfectly centered in the frame. Some variance is possible due to frame alignment, wheel dish, and tire shape.
|
|
Figure 6: Incorrect alignment: too much distance between drive-belt and inside edge of sprocket |
The instructions for adjustment of drive-belt tension and alignment depend on the type of dropouts your bicycle has:
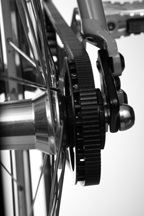
Rotating dropouts (Figure 8)
|
|
Figure 8: Rotating dropouts |
The drive-belt does not require lubrication, and none should be used.
Once a month clean the belt. Wash off any grit or dust with a brush and water.
Removing or replacing a belt takes special tools and skills, so we recommend that your dealer perform this procedure.